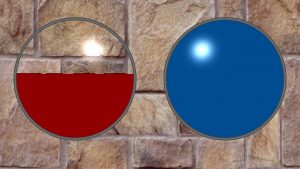
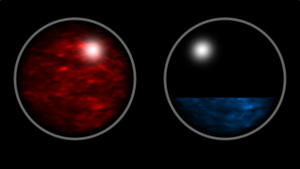
For all the video games I’ve played and all the interesting UIs I’ve seen, I dare say the resource bars used in the Diablo series are my favourite. So what better way to break into blogging than an attempt at recreating them? Before we get into the process, here’s the final product:
My first goal was to emulate the comparatively simple orbs from Diablo II, pictured below. To do this I needed a few things: a way to render a sphere up to a certain level, a specular highlight/shadow, and a nice beveled border to surround the orb.

To do this, I create a rather simple Orb object to contain the orb’s colour, fill level, radius, and position. Rendering a partially filled circle is then done in a in a rather hacky way:
float isColoured(in vec2 uv, in Orb orb){
    float orbBottom = orb.center.y - orb.radius;
    float level = orbBottom + orb.value * orb.radius * 2.;
    if (distance(uv,orb.center) < orb.radius && (uv.y < level)) {
        return 1.;
    }
    return 0.;
}
This of course means that the fill line is a linear progress bar and doesn't represent filled area, but my guess is that Diablo doesn't do that either. The border is done by colouring a threshold around the entire circle and doing a simple linear fade as we move away from the actual edge of the circle.
vec3 applyBorder(in vec2 uv, in Orb orb, vec3 currentColour){
    vec3 colour = currentColour;
    float borderDist = orb.radius - distance(uv, orb.center);
    // Add in a bevelled border
    if (abs(borderDist) < .005) {
        colour = vec3(0.3,0.3,0.3);
        colour += vec3(.7 - abs(borderDist)/.005) * .25;
    }
    return colour;
}
To do our specular highlight, we convert our uv to a 3d-point and apply the highlight math from wikibooks.
vec3 applyHighlight(in vec2 uv, in Orb orb, in Light light, in vec3 eye){
    vec3 colour = vec3(0.);
    if (distance(orb.center, uv) >= orb.radius){
        return colour;
     }

    vec2 distFromCent = uv - orb.center;
    float uvHeight = sqrt(orb.radius - (pow(distFromCent.x,2.) + pow(distFromCent.y,2.)));
    vec3 uvw = vec3(uv, uvHeight);
    vec3 normal = normalize(vec3(uv, uvHeight) - vec3(orb.center, 0.));
    vec3 orbToLight = normalize(light.pos - vec3(orb.center, 0.));

    return vec3(pow(dot(reflect(normalize(uvw - light.pos),
                                normal),
                        normalize(eye - uvw)),
                    55.));
}
At this point, I had a decent approximation of the Diablo 2 orbs.

The next step was to add textures to make the orbs look more like Diablo III's (except for the fill line, I didn't manage to quite have it glow like I wanted). The first step is to turn our circle into a sphere by warping our UVs, which I did using wikipedia's math:
vec2 distFromCent = uv - orb.center;
float uvHeight = exp(sqrt(orb.radius - (pow(distFromCent.x,2.) + pow(distFromCent.y, 2.))) / orb.radius) / exp(1.);
vec3 d = normalize(vec3(orb.center, 0.) - vec3(uv, uvHeight));
float u = (.5 + atan(d.z, d.x) / (2. * 3.14159)) / orb.radius / .5;
float v = (.5 - asin(d.y) / 3.14159) / orb.radius / .5;
Simon Schreibt has a fantastic write-up about how Diablo III actually implements their resource orbs, which tipped me off to using multiple textures multiplicitively as well as scrolling the textures. This is handled like so:
colour *= vec3(texture2D(iChannel1,
               vec2(u + fract(iGlobalTime *.05),
                    v + fract(iGlobalTime * .03))).x)
            	    * 2.15;
colour *= vec3(texture2D(iChannel3,
               vec2(u + fract(iGlobalTime * .001),
                    v + fract(iGlobalTime * .04))).x)
            	    * 2.2;
To shade, we apply a polynomial blend to the edge of the orb. Which gives us a final shader which looks like:

Code for this shader is available here.