Throughout my previous work in graphics, I haven’t really done too much related to animation: sliding spheres/models around sure, but not animating a single rig. To amend that I decided I wanted to implement some kind of key frame-based tech for something simple so I could at least say I had done it. Having previously heard about how some of the Legend of Zelda games do their eyes , and being absolutely in love with how Wind Waker accomplishes many of its effects, it seemed like a perfect jumping off point. To start, here’s our final shader:
The basic idea of the whole system is pretty simple: Draw the full sclera and iris/pupil, mask it, draw the eyelids over top, then draw in the eyebrows. The following handful of screenshots and code snippets show this process as it proceeded.
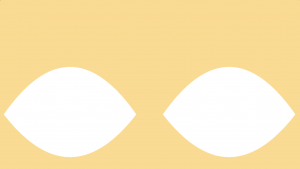
Full Sclera:
As you may notice going foward, a common theme here is to try and avoid code duplication by drawing the right side as a mirror of the left. Since all of our aspects are flat shaded, we only need to determine if something is in a specific layer (in this case, in the slera). If it is, we set its colour to the appropriate one. Due to the sequential nature of the drawing, only the topmost layer ends up “sticking.”
The sclera itself is rendered by intersecting two quadratic equations.
bool paintSclera( in vec2 uv )
{
    vec2 tempUV = uv;
    if (tempUV.x > 0.5) tempUV.x -= rEyeOffset;
    float toSquare = tempUV.x * 1.8 - .42;
    if ((tempUV.y >= .9 * toSquare*toSquare + .04) &&
        (tempUV.y <= -1.0* toSquare*toSquare + .34))
    {
        return true;
    }

 	return false;
}
Pupil:
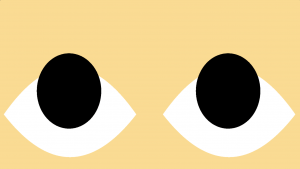
Pretty simply, this is done by rendering an oval, using some reasonably basic math I Googled around to find. Note the use of pupilDilation here, when it came time to animate I wanted to be able to use a scalar factor to increase/decrease the size of the pupil. Perhaps I should have had it as an argument instead of a global value, but I figured it didn’t hurt to have both eyes dilate/constrict the same amount.
bool paintPupil (in vec2 uv, in vec2 pupilCenter, in vec2 eyeSize)
{
	vec2 dist = uv - pupilCenter - focusPoint.xy;
	vec2 part = vec2(dist.x/eyeSize.x / pupilDilation, dist.y/eyeSize.y / pupilDilation); // (x/a, y/b)
	float equation = part.x * part.x + part.y * part.y;
	if(equation < 1.0){
		return true;
    }

    return false;
}
Restricting:
The reverse of the slcera layer, at this point we paint the union of the “outside” of two quadratic functions. The function itself is almost the same as the sclera, but in reverse. Later on, it gets updated to accept key-frames, so it can tween two key-frames.

EyeLid:
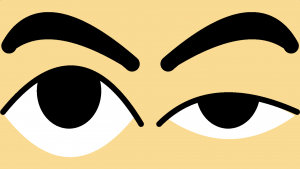
Here we get into a slightly more complex bit. I render eyebrows and the eyelid in the same way: as a quadratic Bézier curve. As I already knew about how they worked and didn’t want to reimplement the tech, I took the implementation from here. If you’d like to learn more about them, you can check out either of those links.
As a consequence, there’s nothing too interesting going on in my code for this: I pretty much just return true if that Bézier drawing function returns an appropriate distance from the curve.

EyeBrow:
Again, this is done similarly to the eyelid, but this time around I draw two Bézier curves to achieve the tapering effect I was going for.

At this point, I had a decent way to render a fully open eye (my first key-frame) and needed to build a system to animate the eyes blinking. We accomplish this by creating a number of different key-frames and by interpolating smoothly between them. Luckily, when I was building the eye originally, I did it using the intersection of two quadratic functions to restrictthe sclera, while a Bézier curve paints the eyelids, this means that a key-frame ID just needs to map to the 3 points which define a Bézier curve and the 4 points to define these two quadratics, a few different key-frames follow.


Perhaps even more importantly, since a keyframe is defined entirely by these handfuls of floats, we can interpolate between keyframes just by lerping between the floats themselves. To do this we just need to indicate what keyframe we’re starting from, which we’re going to, and how far along that progress we are (a float between 0 and 1). You can see that, as well as how I map a shape to the important values (spoilers: poorly) below. A much cleaner solution would have been an array which used the shape ID as a key, and contained a struct containing all the important bits of info. Oh well, it’s something to consider for next time.
bool restrictPupil (in vec2 uv, in int shape1, in int shape2, in float tween){
    vec2 tempUV = uv;
    if (tempUV.x > 0.5) tempUV.x -= rEyeOffset;
    float toSquare = tempUV.x * 1.8 - .42;
    vec3 A,B,C,D;
    if (shape1 == 0){
        A.y = 0.9;
        B.y = 0.04;
        C.y = -1.0;
        D.y = 0.34;
    } else if (shape1 == 1){
       ...
    }

    if (shape2 == 0){
        A.z = 0.9;
        B.z = 0.04;
        C.z = -1.0;
        D.z = 0.34;
    } else if (shape2 == 1){
        ...
    }

    A.x = mix(A.y, A.z, tween);
    B.x = mix(B.y, B.z, tween);
    C.x = mix(C.y, C.z, tween);
    D.x = mix(D.y, D.z, tween);

    if ((tempUV.y <= A.x * toSquare*toSquare + B.x) ||
            (tempUV.y >= C.x * toSquare*toSquare + D.x))
    {
    	return true;
    }
    return false;
}
Lastly, I needed to actually build tech to have the eye actually blink, and move around and this can be seen below.
 // This doesn't *really* focus the eyes, but it makes them slide around together
 // which I guess is close enough
 focusPoint = vec3(sin(iTime * 1.4) * .08, cos(iTime * 0.6) * .07, 0.);
 pupilDilation = abs(sin(iTime * 0.2 + 1.4)) * 0.5 + 0.7;

 // Blink every 4 seconds
 if (int(floor(iTime)) % 4 == 0){
    rEyeTween = fract(iTime);
    lEyeTween = fract(iTime);
    if (rEyeTween <= blinkDuration){
        blinkStageDuration *= blinkDuration;
        while (rEyeTween > blinkStageDuration){
            rEyeTween -= blinkStageDuration;
        }
        rEyeTween /= blinkStageDuration;
        if (fract(iTime) <= blinkStageDuration)
        {
            lEyeShapes.x = 0.;
            lEyeShapes.y = 1.;
            rEyeShapes.x = 0.;
            rEyeShapes.y = 1.;
        }
        else if (fract(iTime) <= 2. * blinkStageDuration)
        {
            lEyeShapes.x = 1.;
            lEyeShapes.y = 2.;
            rEyeShapes.x = 1.;
            rEyeShapes.y = 2.;
        }
        ...
    }
 }
You can find the final source code find here